How to set up Enhanced Server printing on a Windows PC without PDAgent
(Konica Minolta Embedded printers)
PDAgent controls print queues and authenticates print jobs using the Windows account name of the logged-in user. There may be some cases where it makes more sense not to use the PDAgent and have the workstations print directly to the printer with a PIN number set in the driver.
For example, a site whose users’ bring their own laptops to work will probably not have a domain. This means they have no control over the Windows account names of the logged-in user. It may be that many users are logging in with the account name ‘User’. Installing PDAgent and having it control the queues and authenticate based on the account name will record all jobs under the same user record.
In the example above it would be easier to manually create user records in the Resource Manager, and then simply insert the users’ PINs into their printer drivers. Their jobs will still be recorded in the Print Director database and there is no need to install the PDAgent or alter the user’s account name on their PC. Any credit limits and Rules will still be enforced. However, their jobs will not go into the ‘Follow Me’ system. They will have to collect their jobs at the printer to which they were sent. ID & Print can still be used on the printer to allow for secure print release.
Ensure the job tracking method is Enhanced Server
Firstly, we need to ensure that the Shared Device print job tracking method is set to Enhanced Server:
- Open Resource Manager
- Navigate to Device Management > Shared Devices.
- Double click on the printer on the right.
- Click the Controller tab.
- Click the Print Jobs tab.
- In the Print Job Tracking frame, ensure the value in the Tracking method drop-down is Enhanced server counter notification.
- Click OK.
Ensure a user record exists for the user in Resource Manager
We need to ensure we have a record for the user in Resource Manager with a PIN number we will use to insert into their printer settings on their PC. If the user exists, take note of their PIN. To create the user, follow these steps:
- Open Resource Manager.
- Navigate to User Management > Users.
- Click Add.
- Choose the Department into which the User must be placed and click OK. The new user defaults set for this Department will be inherited.
- In the User Name text box, enter the user’s full name.
- In the Controller User ID text box, enter the PIN number the user will use to log in to the printers. Click the Auto button to generate a random, unique PIN number.
- If the user has a card and the printers make use of card swipe authentication, enter the user’s card number in the Card No text box.
- Enter the user’s email address in the Email Address text box. This is used for the following purposes:
- Allowing for Scan-to-me functionality on Konica Minolta and Lexmark Embedded Devices.
- Sending emails from within Resource Manager.
- Sending emails after Rule violations.
- Click OK.
Ensure the PDAgent is uninstalled or disabled on the users’ PCs
We don’t want the PDAgent running on the users’ workstations because it will override the driver authentication and insert the PIN for the logged in user account as opposed to the PIN you want to insert. Either uninstall the PDAgent or open Services.msc and set PDAgent start-up type to Disabled.
Edit the printer driver to insert the user’s PIN
- Open Control Panel > Devices and Printers. Right click the printer and choose Printer Properties.
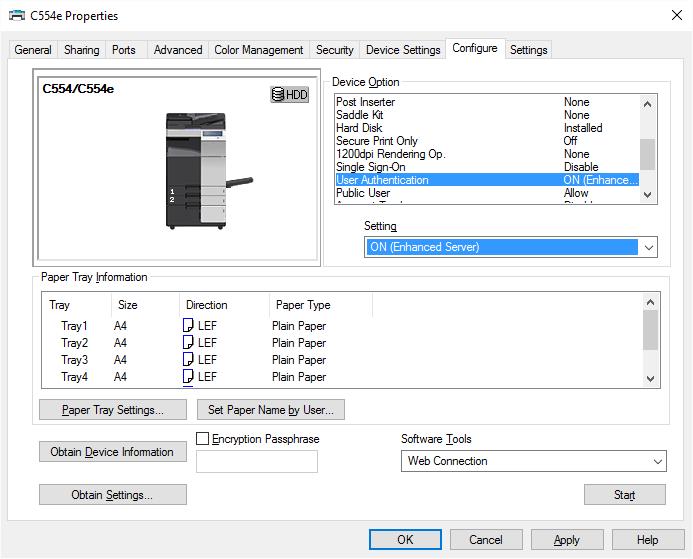
- Click the Configure tab.
- In the Device Option frame, ensure that the User Authentication option is set to ON (Enhanced Server). If setting is incorrect and the dropdown to change it is greyed out, we need to disable the Auto settings option:
- Click the Obtain Settings button.
- Untick the Auto checkbox.
- Click OK.
- Now change the User Authentication setting to ON (Enhanced Server).
- If you changed any settings, click Apply.
- Click the General tab.
- Click the Preferences… button.
- In Printing Preferences window, click the Basic tab.
- Click the Authentication/Account Track… button.
- Untick the Public checkbox and enter the user’s PIN number.
- Click the Verify button to check that it works.
- Click OK and OK again.